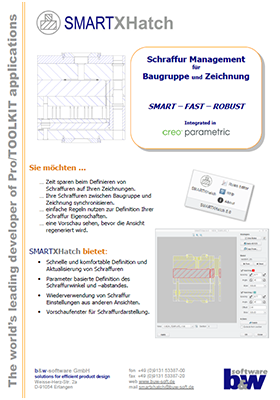
Wizardry for hatchings SMARTXHatch
- Apply hatchings with ease in assembly drawings
- Use rules to automate hatching tasks
- Inherit or copy hatchings to other views
Benefits for your company
With SMARTXHatch you can ease the pain of your drawing creation time when it comes to updating drawing hatchings. The intuitive interface guides you step-by-step through the entire process.
During definition, a large preview window shows you the current state of the hatchings. From there you can transfer the settings you have made to other views quickly and easily.
Manifold possibilities of the included rule sets can automate a large part of the hatching tasks. SMARTXHatch automates all the important tasks to reduce the manual work to a minimum.
-

Comfortable
The modern and user-friendly interface allows to perform hatching tasks intuitively with just a few clicks.
-

Timesaving
Use the interactive preview window to configure hatches individually without waiting for all 2D views to regenerate.
-

Automated
With just one mouse click you can apply an extensive rule set to control hatchings of an entire assembly at once.
-

Flexible
In addition to the Creo functionality, you can easily apply already defined hatches to other views.
Videos
Here you will find a selection of current videos that will
bring SMARTXHatch closer to you.
Functionalities
Use intuitive workflow
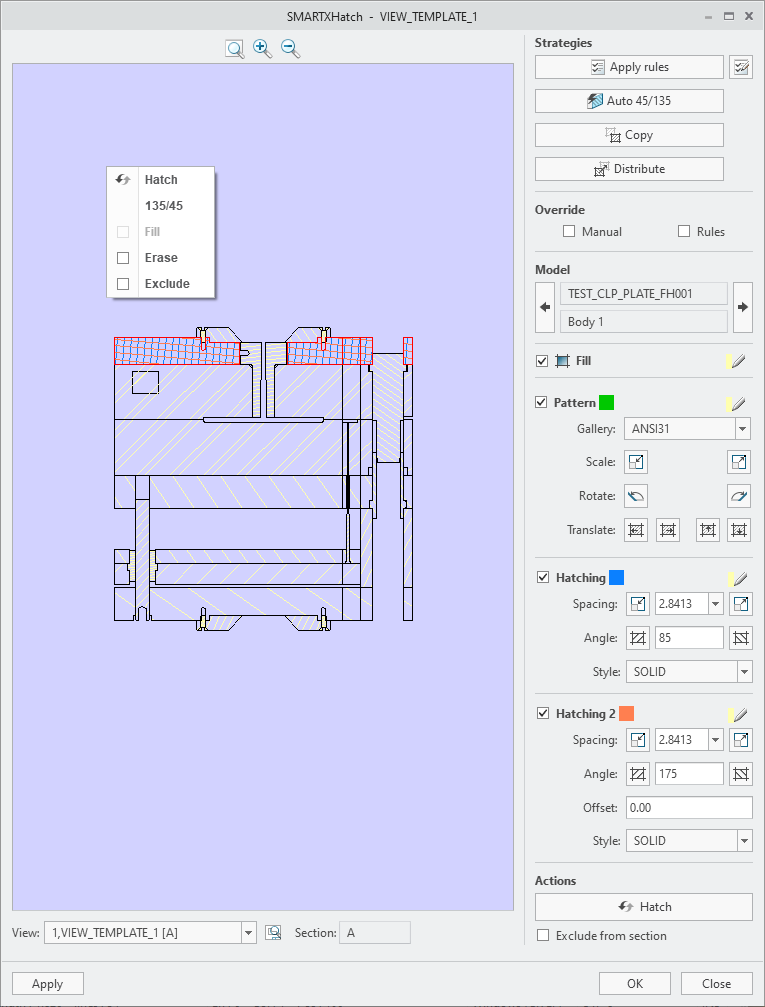
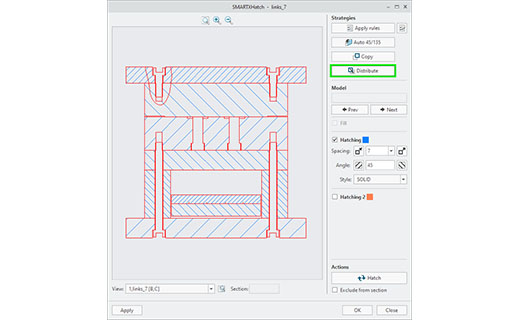
 Select the hatching to be edited in the drawing and open SmartXHatch from the context menu. Use the interactive preview window and the toolbar on the side of the screen to work through your hatch settings one after the other.
You can choose from predefined rules, manual adjustments, and copy or transfer mechanisms.
Apply predefined strategies
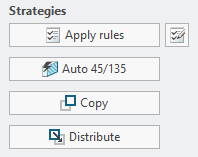 Apply rules to hatching
Use a predefined rule set to make changes to all components at once. For example, you can elegantly exclude standard parts that should not be hatched in one step.
Auto 45/135
The software automatically iterates through all components and sets the hatching angle alternately to 45° or 135°. This gives you a clean hatching image without any effort, which you can of course adjust manually afterwards.
Copy hatching from another view
Use the settings already made for another view in your drawing to apply them to the current view in one step. The settings for all parts cut in this view are transferred from the other view. You can now add additional sectioned parts manually.
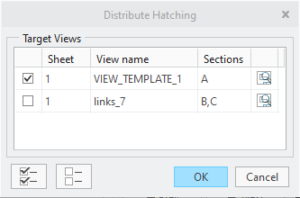
Distribute hatching settings to other views
If you want to transfer the customized hatching settings of a component to other views, use the distribution function. In a selection dialog box you can select individual or all views of the various drawing sheets as the target. The settings of this component are then automatically transferred.
Customize hatchings manually
Besides the automatic tools, the hatching of a component can also be adjusted manually. To do this, you can select the component in the preview window and first, decide about the type of hatching. You can use the following types:
- Fill component completely
- Use standard pattern
- Apply a single hatching
- Use two overlaid hatchings
- Exclude component from hatching
- Eclude component from cross-section
The following properties can be set for the hatching itself:
- Angle
- Distance
- Line type
- Distance value to first hatching (for second hatching)
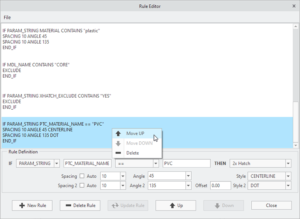
Utilize rule-editor
In the rule editor, you define your own rules for hatching automation. The rules are processed one after the other and applied to the components. Model parameters or the model name can be used as criteria.
Request Demo Version
Have we aroused your interest?
Then you are welcome to request a demo version from us here.
Technical details
Find out about the supported Creo® versions
in our product calendar.
More information?
News
-

New Creo Version available
-
New function available in SMARTXHatch
-

New function available in SMARTXHatch
-

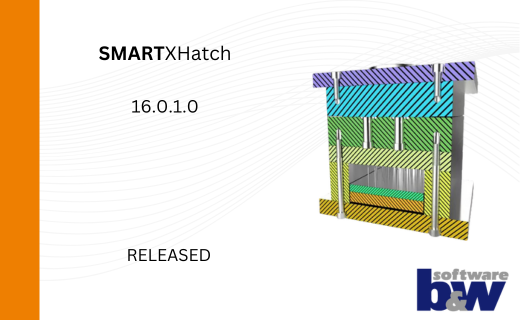
New Release of SMARTXHatch 10.0.2.0
-
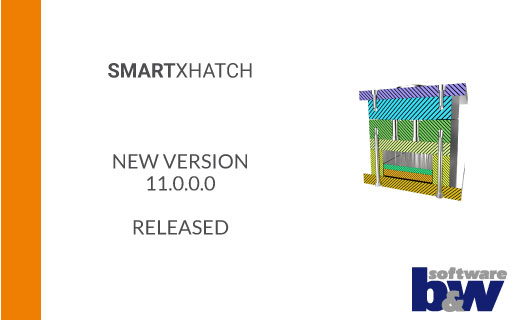
SMARTXHatch 11.0.0.0 released
-

SMARTXHatch 10.0.1.0 released
-
SMARTXHatch 10.0.0.0 released
-

SMARTXHatch 9.0.0.0 released
-
SMARTXHatch 8.0 M120 released
-
SMARTXHatch M110 released
-
SMARTXHatch 8.0 M100 released