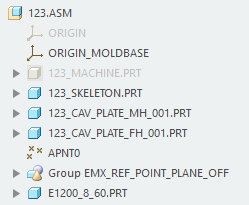
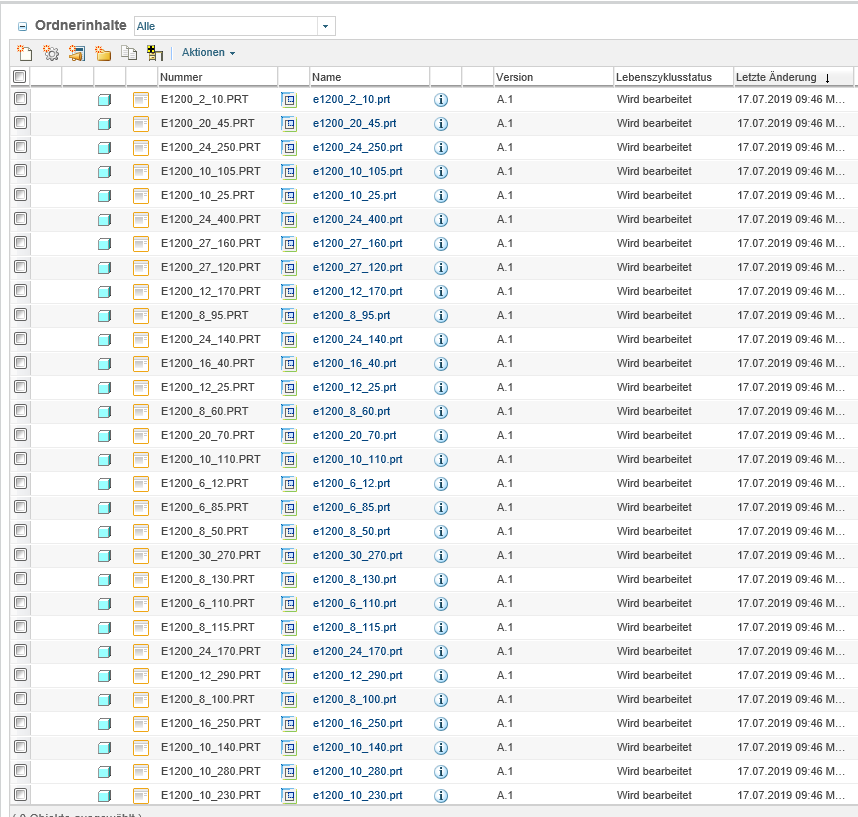
EMX Standard Parts from Windchill
In this a bit longer blog post we will demonstrate which steps are required to:
- configure Expert Moldbase Extension for Windchill.
- to automatically create all instances of one standard component and check-in these models to Windchill.
- to assemble standard parts from Windchill in mold base designs
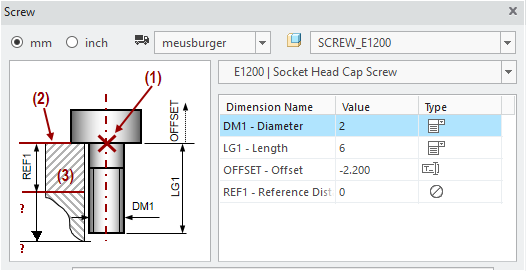
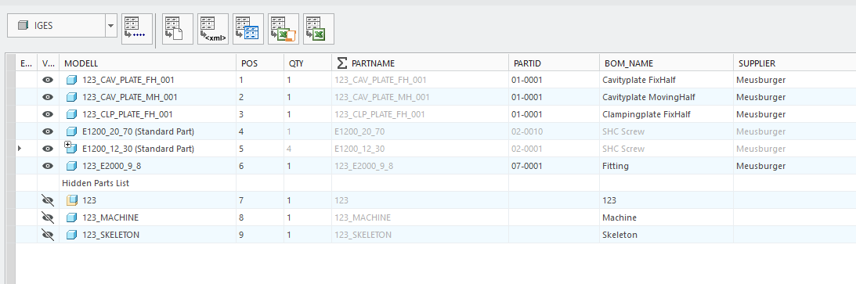
As an example the screw type E1200 from the supplier Meusburger is used
1. Assemble components without Windchill
To explain the assembling procedure for standard parts with the help of Windchill, it is necessary to initially explain the assembling procedure without the help of Windchill.
a) The Template Model
The basis of each EMX component is a generic template model, which contains:
- The geometry
- All dimensions with defined symbol names
- The required assembly references
The screw type E1200 uses the template file screw_e1200.prt.
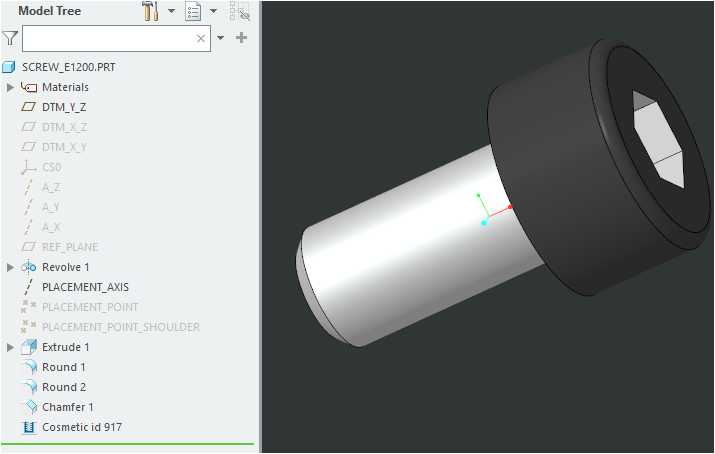
This file is located wihtin the installed software under the following path:
"<emx-installation-path>\components\<unit>\<type>\<template-file>"
In the example: "<emx-installation-path>\components\mm\screw\screw_e1200.prt"
Important: A template file can be used for several types, like screw_2.prt:
- DME – M
- Hasco – Z31
- DIN – 912
- etc.
This needs to be considered when changing the partname rules later on.
b) The *.dat Component Definition File
The component is defined within a text based *.dat file. The name of the file is equal to its type name. This file contains the full logic behind a component:
- Assembly References
- Name of the template file
- Assigned Material
- Variable Options
- Nominal Values for Instance Selection
- Symbol Names of the Dimensions
- Instances with Dimension Tables and Order Numbers
- Cut Out Definitions
- etc.
The screw type E1200 uses the file E1200.dat.
This file is located within the installed software under the following path:
"<emx-installation-path>\components\<unit>\<type>\<supplier>\*.dat"
In the example: "<emx-installations-pfad>\components\mm\screw\meusburger\E1200.dat"
c) The Part Name Rules
Another important aspect is the set of part name rules. These rules are defined in the EMX Options under the tab Part Name.
The set of part name rules are saved to the configuration file partnames.cfg which is located under the following path:
"<emx-installation-path>\configuration\partnames.cfg"
Using this set of part name rules, the renaming of each template file can be controlled during the assembly procedure in Creo.
In the example the standard part name rule <pre>_<instance> for the file screw_e1200 leads i.e. to a full name 123_E1200_8_60.prt. This is a combination of the project prefix “123” and the instance name E1200_8_60.
d) Assembling Procedure without Windchill
During the assembly procedure the previously described files are used in 3 steps:
- In the screw dialog box the supplier, the type and the instance needs to be selected based on the information provided in the *.dat file.

- The template will be loaded and assembled. All dimensions will be adapted and the material will be assigned.
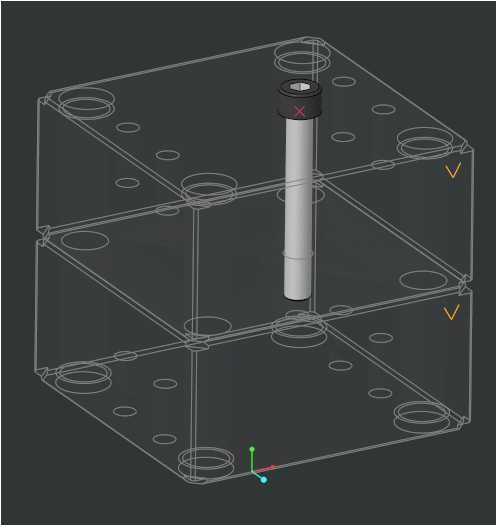
- The Model will be renamed based on the part name rule. All parameters will be written to the model.
2. Differences when Working with Part Names from Windchill
Serveral steps are different in case standard parts are assembled from Windchill:
- A generic template file can not be loaded any more.
- All standard parts are directly pulled from Windchill.
- Each instance model available in Windchill needs a unique name. This name has to be project independent, which means that ID (<id>) or project prefix <pre> are not allowed within the part name rule.
- The part name rule has to fit to the model instances available in Windchill.
- It is not allowed to modify models from Windchill, which means all parameter values, dimensions and assembly references have to exists already within the windchill model.
The assembly procedure in 3 steps is now a little different:
- In the screw dialog box the supplier, the type and the instances still need to be selected.
- The model is now retrieved by name and assembled from Windchill, based on the part name rule.
- Part name, parameter values and dimensions are not changed.
3. Configure EMX for Windchill (Administrator)
To assemble standard parts from Windchill several configuration tasks need to be done.
a) Provide a Custom Configuration using the EMX _USER_CONFIG_PATH variable
In the beginning it is necessary to provide a custom configuration.
The goal is that all users within a company are working with the same configuration.
To fulfill this goal several tasks need to be done:
- The standard configuration folder from the EMX installation
"emx-installation-path\configuration"needs to be copied to a server location which is visible for all users, i.e."<server-path>\emx-adaptions\configuration" - This folder should have writing restrictions for all users and should only be modified by the administrator.
- Finally, it is required to set the Windows variable
EMX_USER_CONFIG_PATHto the value<server-path>\emx-adaptionsfor all users. EMX will then find the custom configuration at this location.
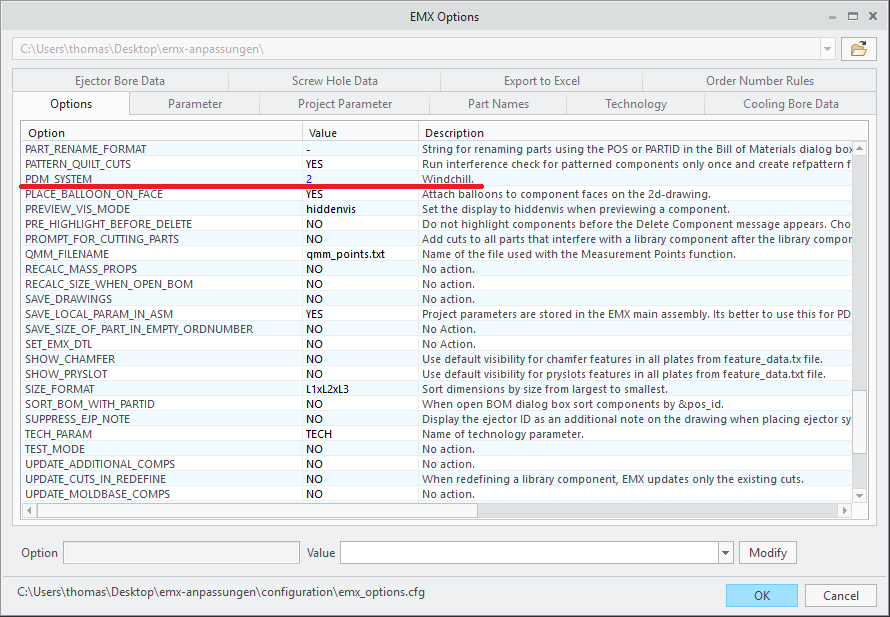
b) Set EMX Option PDM_SYSTEM
In the EMX Options ![]() the config option
the config option PDM_SYSTEM needs to be set to 2 - Windchill.
c) Configure Part Names in EMX Options
In the EMX Options ![]() > Part Names the part name rules have to be adapted in a way that the resulting part name is project independent. ID (<id>) or project prefix (<pre>) have to be removed.
> Part Names the part name rules have to be adapted in a way that the resulting part name is project independent. ID (<id>) or project prefix (<pre>) have to be removed.
For the screw E1200 with the according template file screw_E1200.prt the part name rule is set to <instance>.
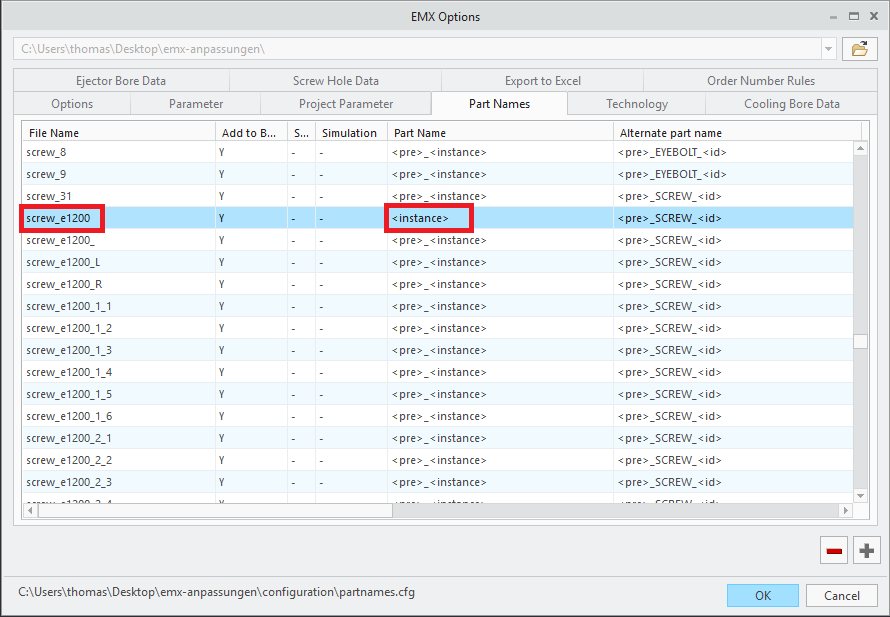
As a result the name will be, i.e. E1200_8_60. These instance names come from the dimension tables in the *.dat file.
d) Reduce Variety of Selectable Components in the Screw Dialog Box
When working with standard parts from Windchill it make sense to only provide the component types which are actually administered in Windchill.
To achieve these goal the available suppliers and screw types need to be reduced.
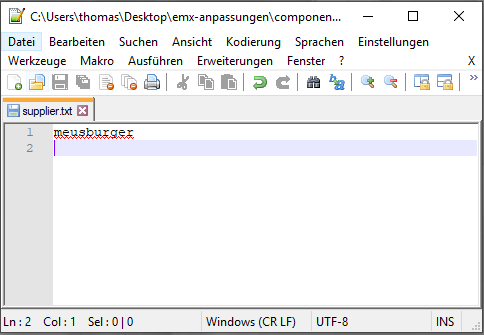
The supplier list can be restricted by providing a adapted supplier.txt file in the correct location. This file needs to be placed to the following path in the custom configuration.
EMX_USER_CONFIG_PATH\components\mm\screw\supplier.txt
As template, the equivalent file from the EMX standard installation can be copied.
<emx-installation-path>\components\mm\screw\supplier.txt
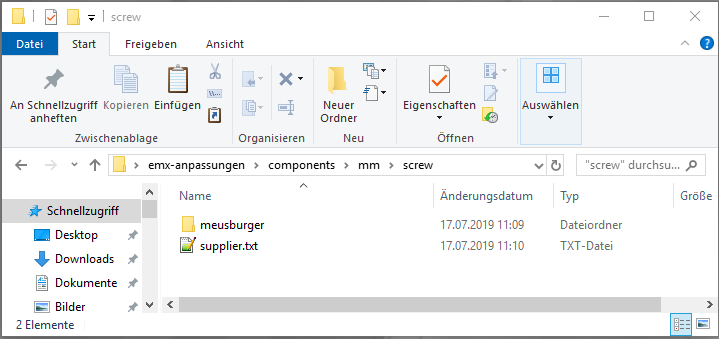
In general can be said: If a file is found in the custom configuration, it has a higher priority compared to the equivalent file from the standard installation and will be used instead.
In the given example the content of the supplier.txt is therefore reduce to meusburger only.
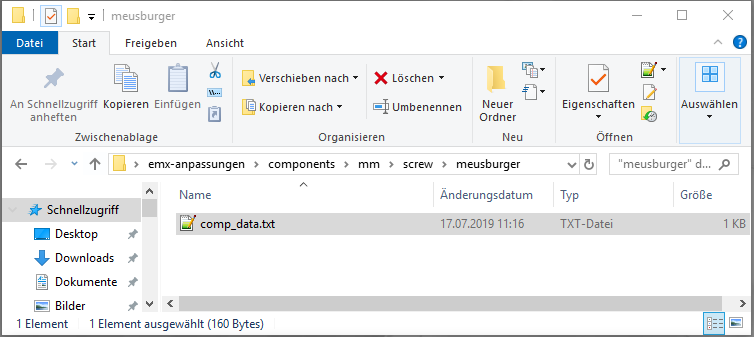
The restrictions for the screw types follow a similar pattern. An adapted comp_data.txt needs to be created. The location is however inside a supplier specific folder.
EMX_USER_CONFIG_PATH\components\mm\screw\meusburger\comp_data.txt
As template, the equivalent file from the EMX standard installation can be copied.
<emx-installation-path>\components\mm\screw\meusburger\comp_data.txt
In this comp_data.txt all lines except the relevant E1200 line have to be deleted.
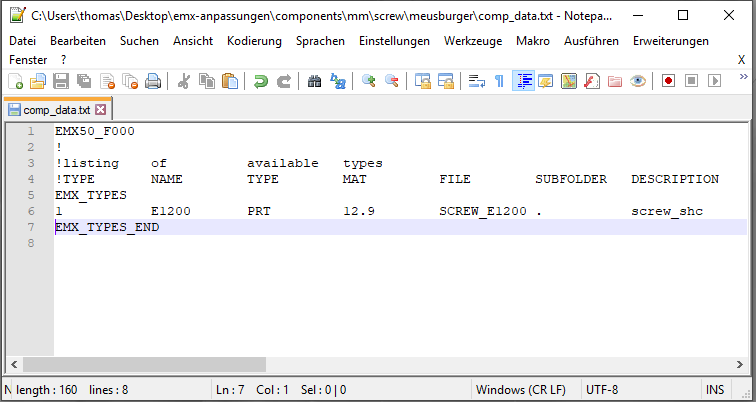
In the screw dialog only E1200 screws from Meusburger can be assembled.
d) Create All Screw Instances
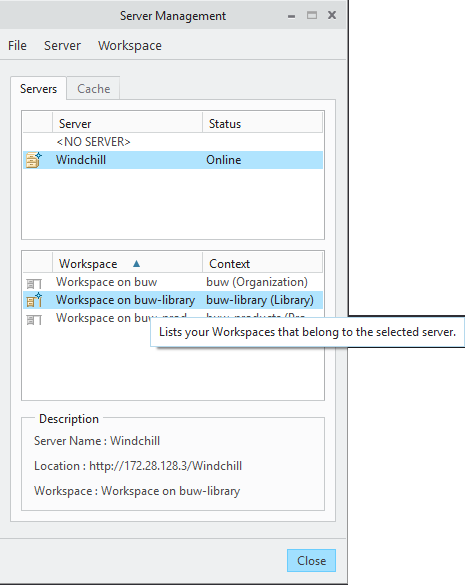
Before creating the all instances of the E1200 screw one should connect to the Windchill-Server and login as and administrator.

The Workspace for the Windchill library should also be activated.
Using the EMX Component Editor ![]() all instances of a component can be created.
all instances of a component can be created.
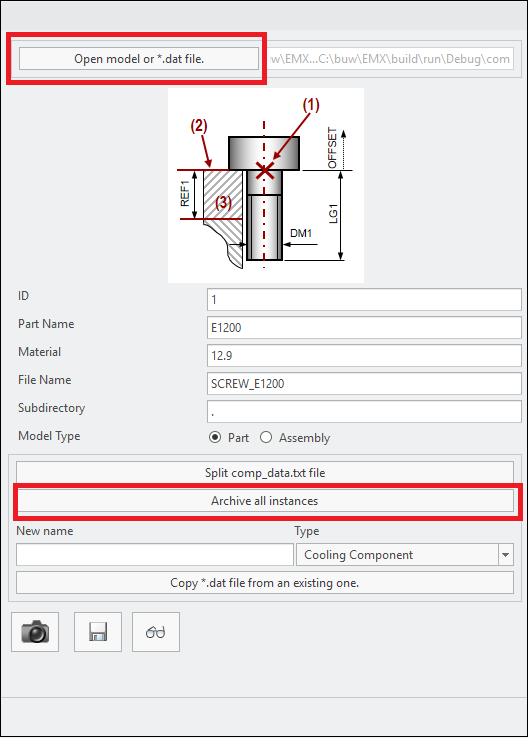
Therefore theses steps a required:
- Open the Component Editor.
- Open the file
E1200.datfrom the standard installation<emx-installation-path>\components\mm\screw\meusburger\E1200.datusing Open model or *.dat file - Click the button Archive all Instances.
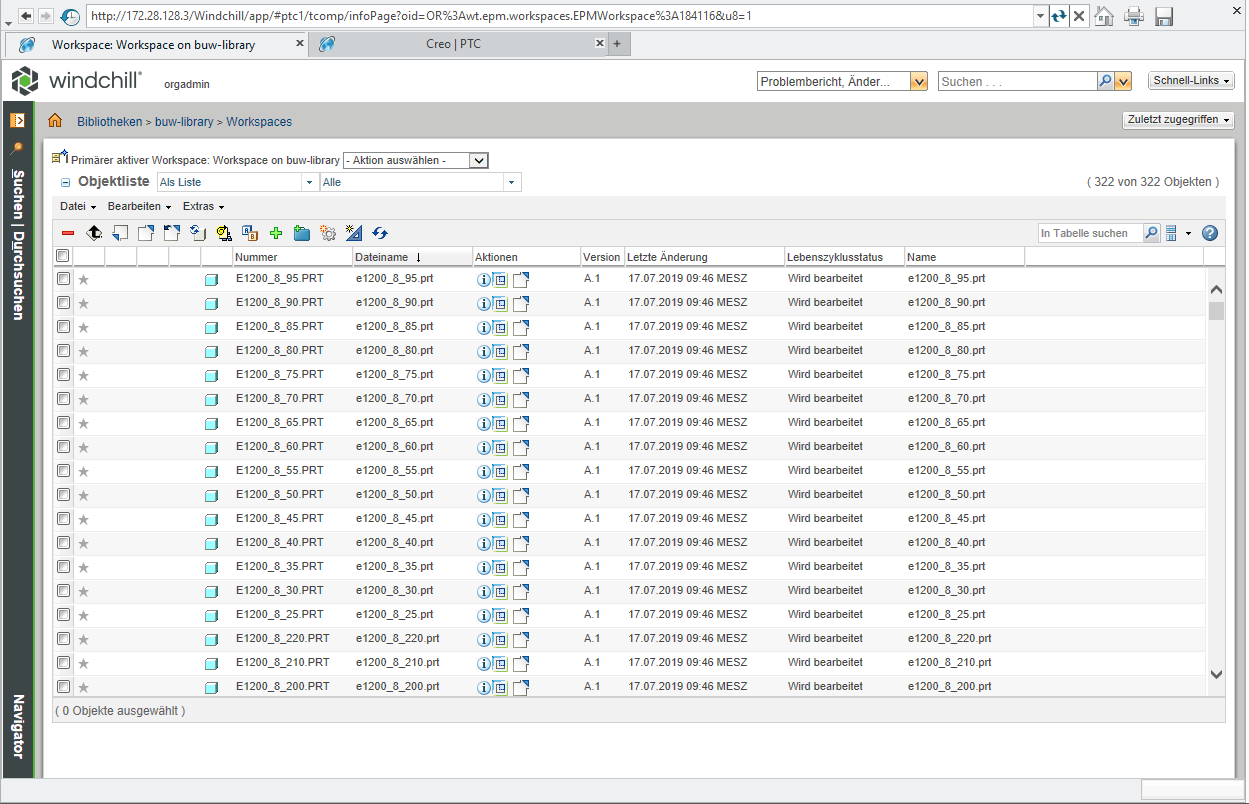
All Instances are saved to the current workspace.
e) Check in all Instances to the Windchill Library
To provide the created instances to all users it is now necessary to store the models in a structured way in the Windchill library.
It is recommended to use a folder structure which is similar to the folder structure in the EMX standard installation.
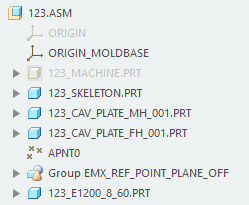
For the example screw Meusburger E1200, the following structure is used.
buw-library > emx-components > mm > screw > meusburger > e1200
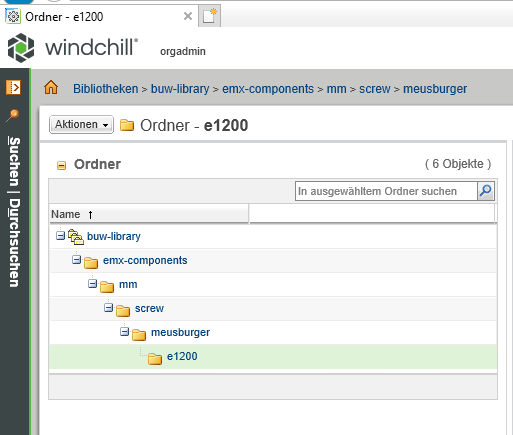
Using this structure has several advantages. The stored EMX standard parts library can be extended easily step-by-step in the future. Furthermore, it is quite simple to find the models even after a longer period of time.
Using the Windchill Check-In mechanism the files can be stored in the e1200 folder.
After this step EMX is fully configured and screws can now be pulled from Windchill.
3. Assembling EMX Components from Windchill (User)
From a user perspective not much changes during the assembly procedure of components.
However, within the screw dialog box the user is now informed about the source of the model.
In case a model is found in the common space by the part names rule, an additional icon with a short message “The model is found in common space” is displayed in the bottom area of the dialog.

In case no model was found in common space and the standard assembly procedure is used, an alternative message “The model is created from local template file” appears.

Additionally, the standard part status is also visualized in the Bill of Materials. Parameters can not be edited and are therefore disabled.
In case any question may arise related to Expert Moldbase Extension with Windchill do not hesitate to contact us under this mail emx@buw-soft.de.
This could be interesting for you
-

New Creo Version available
-

Review: PTC/USER 2026
-

Fachkonferenz Digitalisierung 2026 in Stuttgart
-

Join us at PTC/USER Global Summit 2026
-

Review: User Meeting – Toolmaking in Creo 2025
-
Future of B&W has begun
-

No security alert of B&W License Server 11.19.1.0 regarding lmadmin
-

Potential issues in running B&W Software products in Creo 9.0 and 10.0
-

Meet us at the PTC/USER Global Summit 2024 in Orlando!
-
User Event Tooling 2023
-
Successful Windchill implementation project
-
SMARTElectrode 19.4 for Creo Parametric 13 now available
-
New SMARTElectrode Versions released
-

Technology Parameters for Interface to Zimmer & Kreim Alphamoduli
-
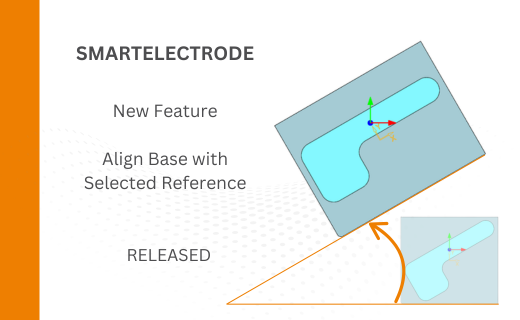
Align Base with Selected Surface
-

New Electrode Assembly with Custom Origin
-
New Version for IFX out now!
-
Additional Washer and Nut for IFX
-

New Logging Options
-
Improved translation of library files in IFX
-
PTC/USER Agenda